Showing posts with label halloween. Show all posts

Wednesday, November 16, 2011

Pumpkin Patch Treats


Soccer season is over and we just had an end of the season soccer party for String Beane's team.  My job was to bring a dessert.  

I really did not want to make another trip to the store for any ingredients.  So I just pulled something together with what I had on hand.

I think they turned out cute.

I used Duncan Heins chewy fudge brownie mix and made brownies in a muffin tin.  Then I frosted them with the famous Crisco butter cream, tinted green.  And I stuck on a pumpkin candy that we had left over from Halloween.


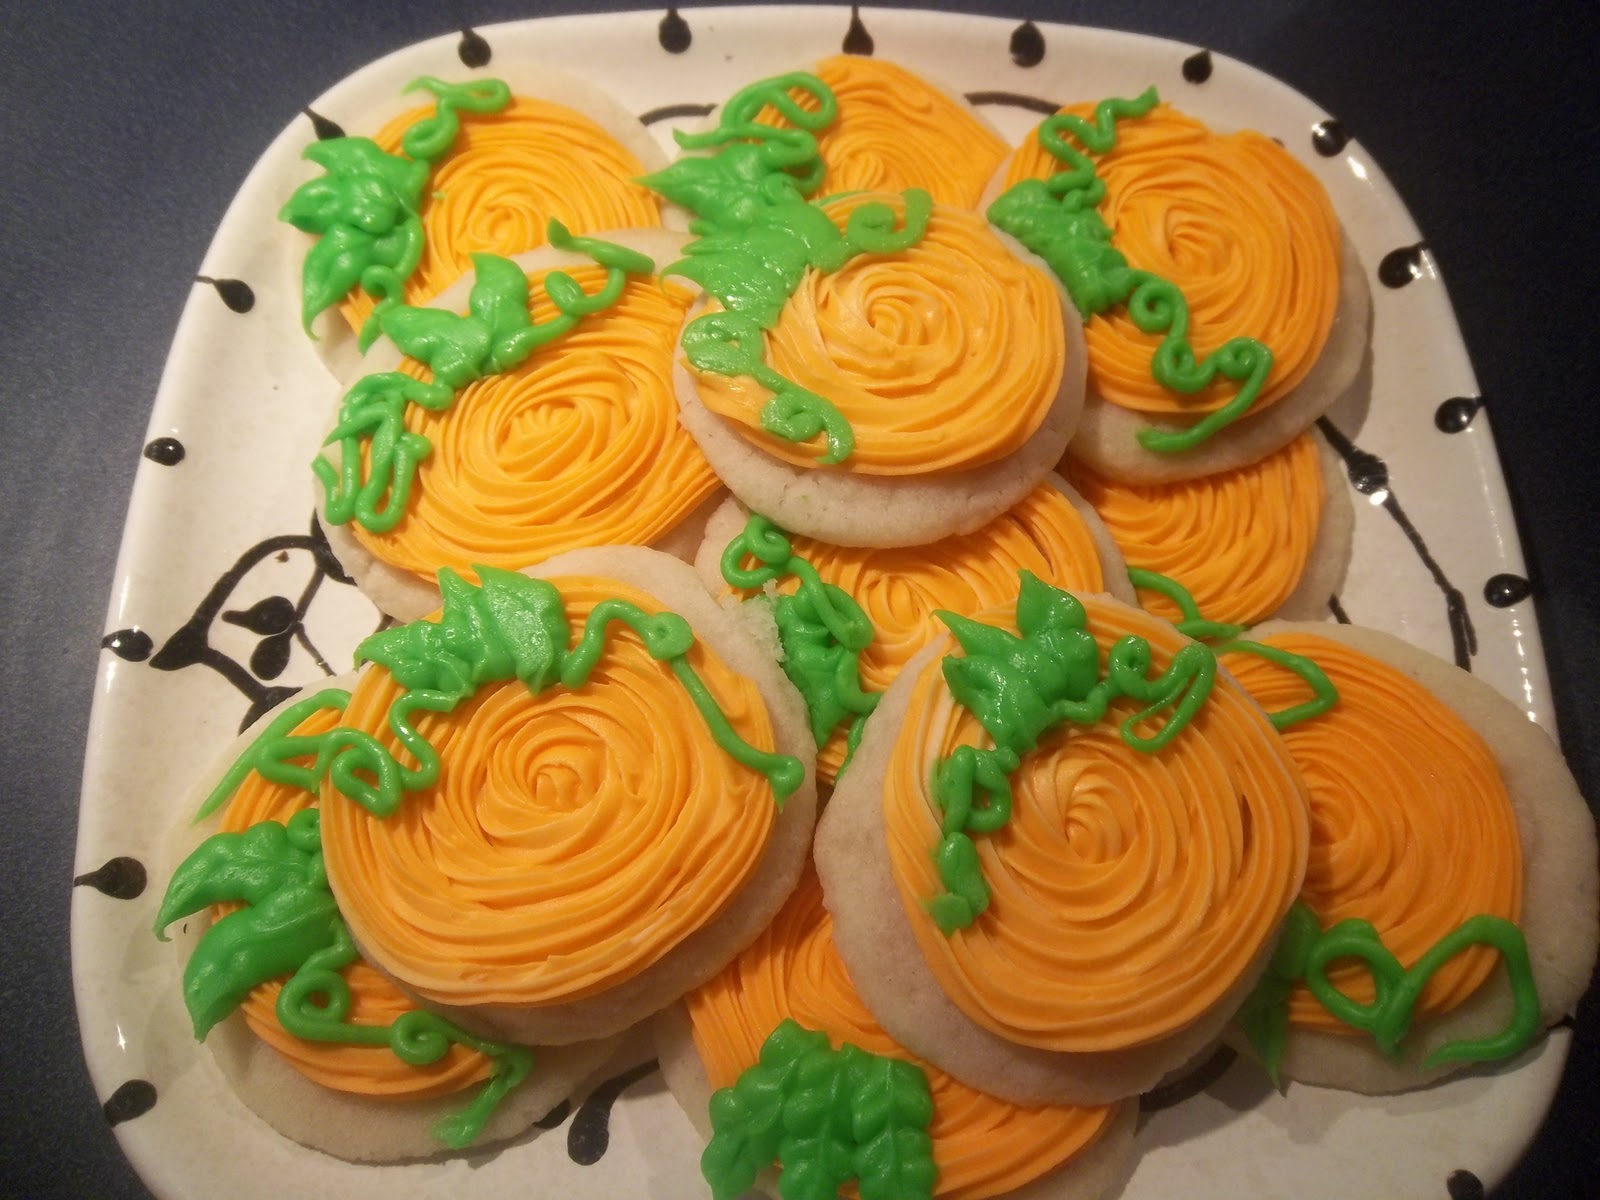
Then I used some Pillsbury sugar cookie dough and made the cookies, according to the package.  Slice and bake.  I had some orange frosting, Crisco style, left over from Halloween.  I piped on the frosting in a swirl and then used some of the green frosting to pipe leaves and vines.
The little soccer team loved them.  I loved them too.  It was a win, win.  And a great way to use what I had on hand to make something special for my String Beane! 

I am linking up again at Metamorphasis Monday
and these other awesome parties!

Gobble up the Left Over Candy

We have a pill of Halloween candy lying around here.  A bunch of what we got was chocolate candy and candy that contained String Beane's allergens.  So, Mr. Homegrown and I have been "secretly" eating some when we thought the other wasn't looking.  There are candy wrappers stuffed all over the office and our cars!  Who are we kidding? 

I needed to do something to stop the maddness of the candy.  I saw a couple cute ideas on Pinterest that I decided to morph together.  It worked out great! 

First up was to get rid of some of the candy!  I found this recipe for Candy Bar Shortbread Squares and I gave it a try.  They turned out so good!  I was glad I had a plan to give them away. 


Ingredients

1 cup (2 sticks) unsalted butter, room temperature (not margarine!)
3/4 cup packed light-brown sugar
1 teaspoon kosher salt
2 cups all-purpose flour
1 cup semisweet chocolate chips
2 cups assorted chocolate candies or roughly chopped candy bars (12 ounces)
Directions
Preheat oven to 350 degrees.
In a large bowl, beat butter, brown sugar, and salt on medium-high until light and fluffy.
With mixer on low, add flour in three additions
and beat until combined (dough will be crumbly).
Press dough evenly into an 8-inch square baking dish.
Bake until golden brown and firm, 25 to 30 minutes.
Scatter chocolate chips on top of shortbread.
Bake until soft, 1 minute.
With the back of a spoon, spread chocolate evenly over shortbread.
Scatter candies over top and press down gently.
Let cool on a wire rack 30 minutes.
Refrigerate briefly to set chocolate, then cut into 16 bars.

Here is a close up of the yummy goodness.

Now I had to come up a way to get these out of the house without breaking the hearts of three little Beanes.

That is where the cute idea for the Neighborhood Thanksgiving Turkey came in handy.  Click over and grab a free printable of this adorable activity.  My little Beanes liked the idea of a surprise attack on one of our neighbors!

I bagged up the Candy Bar Shortbread in clear bags and tied them off with a green ribbon.  Then I printed off the Neighborhood Turkey printable.  Then, String Beane and I snuck over to our neighbors house when they weren't home and left the treat on their doorstep.
I will love watching all of the Neighborhood Turkeys make their way around our neighborhood. 
This was such a fun activity!  And a great way to dump some of the extra candy.  How do you get rid of your extra Halloween candy?
I am linking up at Metamorphasis Monday
and all of these other awesome parties

Thursday, October 27, 2011

Fall Party Food - Allergy Friendly

String Beane is in kindergarten this year.  He is my first born and off to school he went.  It was traumatic for me to say the least.  

He goes to a Christian school and there are only 11 children in his class. 

3 of them have food allergies.  The total breakdown is:  No peanuts, tree nuts, wheat, or milk!  That is a tall order, my friends.  Also, since it is a Christian school, nothing too "Halloweenish".  All of these demands makes throwing a party difficult.  But, I am hear to tell you, it can be done.

I found most of my inspiration on Pinterest.  Here is what went down.

I had three stations set up.  One was a counting game.

The second station was a craft station.
IMG_1026

The third station they made their own cake push pops.
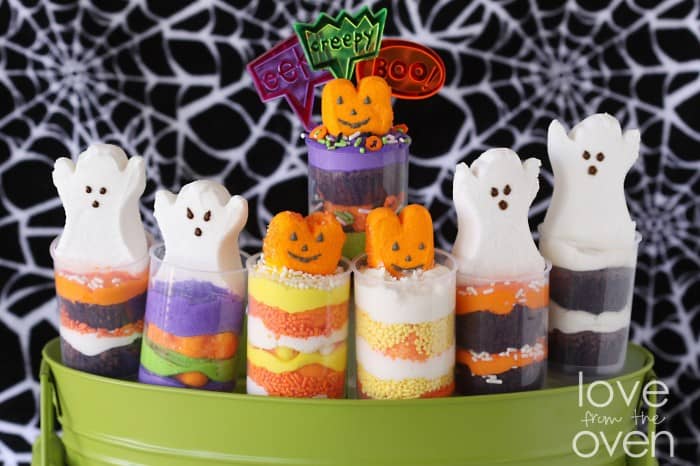

We did not use the ghost peeps, only the pumpkin ones.  I did not want to push the envelope first party of the year.

The candy corns for the counting game met our allergy needs.  I made mini cakes from a gluten free cake mix that happened to be milk and peanut/tree nut free too.  I made up yellow, white, and orange frosting from Crisco and powdered sugar to squirt in the cake pops. 

Everyone seemed to have a great time rotating through the stations and making things. 

Then they all sat down at their desks for the food.  We started out with:
These were water bottles with some orange flavored "on the go" drink packs.  I tied them with green ribbon and a straw.  The kids seemed to think this was some sort of a magic trick!


I used a gluten free brownie mix and used dairy free margarine for the brownies.  The marshmallow was okay for our allergies and I used a can of Pillsbury vanilla frosting and orange food coloring.  The pumpkin stem is a green gum drop that I cut down to size.


This was made with popcorn, marshmallows, candy corns, and dairy free chocolate chips.  It was very cute when I cut it into slices.

They also had bags of chips. 

While they were eating I carved a Jack-O- Lantern using the Pumpkin Prayer.

As I carve my pumpkin, help me pray this prayer:
Open my mind so I can learn about You
(Cut the top off the pumpkin)
Take all my sin and forgive the wrong that I do
(clean out the inside)
Open my eyes so Your love  will see
(cut eyes shaped like hearts)
I'm sorry for times I've turned up my nose at what You've given to me
(Cut a noes in the shape of a cross)
Open my ears so Your Word I will hear
(cut ears shaped like the Bible)
Open my mouth to tell others You're near
(cut the mouth in the shape of a fish)
Let Your light shine in all I say and do!
Amen
(place candle inside and light it)

The pumpkin carving seemed to be the favorite part.  It was really amazing how still they were while I was trying to hack into the pumpkin!

All I have wanted for String Beane, was for him to be able to do what the other children are doing.  I don't want to have to worry about food.  I guess since he is in a class where 3 of 11 have severe food allergies, he would be considered "normal".  Funny how God chooses to answer our prayers. 

Special diets and situations are certainly more difficult to deal with than what we may be used to, but it can be done!  I am here to tell the tale. 

I am linking up with Metamorphasis Monday
and these Awesome Parties!

Sunday, October 23, 2011

Mums the Word

Are you ever sorry you started something?  I tried to make my little Beanes happy with these mummy cupcakes.

Butter Beane has been walking around the house for two days now saying "Mummy, Mummy". 

He won't quit.  This was cute at first and I was thrilled he seemed to appreciate the mummy cupcakes. 

Then it got sort of old.  Also, he wants to dress up as a mummy for Halloween.  So we are hearing a lot about mummys right now.  I will be sort of glad for Halloween to come and go. 


 I saw some version of these adorable mummy cupcakes somewhere in blog land.  I can't remember where I originally saw the idea.

Anyway, these cute mummy cupcakes are super easy and my boys loved them!

I made some pumpkin cupcakes and then used some cream cheese frosting and decorative candy eyes and viola`. 

I used this recipe for the pumpkin cupcakes:

2 cups Bisquick Mix
2 cups granulated sugar
1/2 cup vegetable oil
2 teaspoons ground cinnamon
1 teaspoon baking soda
4 eggs, slightly beaten
1 (15 oz) can pumpkin , not pumpkin pie mix

Heat oven to 350 and spray cupcake liners with cooking spray.  In a bowl, beat all ingredients on low for 30 seconds, scraping bowl frequently.  Then beat on medium for 2 minutes scraping bowl occasionally.  Pour into cupcake liners.  Bake for 18-22 minutes.  Or until a toothpick comes out clean.  Cool completely. 

For the cream cheese icing:

3 oz softened cream cheese (I used Touffuti cream cheese)
1/3 cup butter or margarine, softened (I used Flieshman's unsalted)
1 Tablespoon milk (soy)
1 Teaspoon vanilla
2 cups powdered sugar

In medium bowl, beat cream cheese, butter, milk and vanilla with electric mixer on low speed until smooth. Gradually beat in powdered sugar on low speed until smooth.  Add more sugar or milk, as needed, to get the consistency you like.

I dotted some of the icing on the back of the eyes and stuck them on the cupcakes.  Then I piped on the rest of the icing in random strips. 

I think they turned out pretty cute. 

 
I am linking up with Metamorphasis Monday
and these other Awesome Parties.

Wednesday, September 28, 2011

Halloween Snake Sandwich

Several years ago there was an episode of Paula Deen that featured some Halloween recipes.  This snake sandwich was one of the featured recipes.

I can't remember exactly what the sandwich fillings were that Paula used.  This is totally customizable to suit your tastes. 

We use things that do not contain milk (like cheese) in our snake sandwich so my String Beane can eat it.  Before he was born I made one of these for a Halloween Party that contained a couple different types of cheeses.  It was yummy!

I am going to list the directions for how we made the Snake Sandwich for our family.  You take it and run with it however you want to.


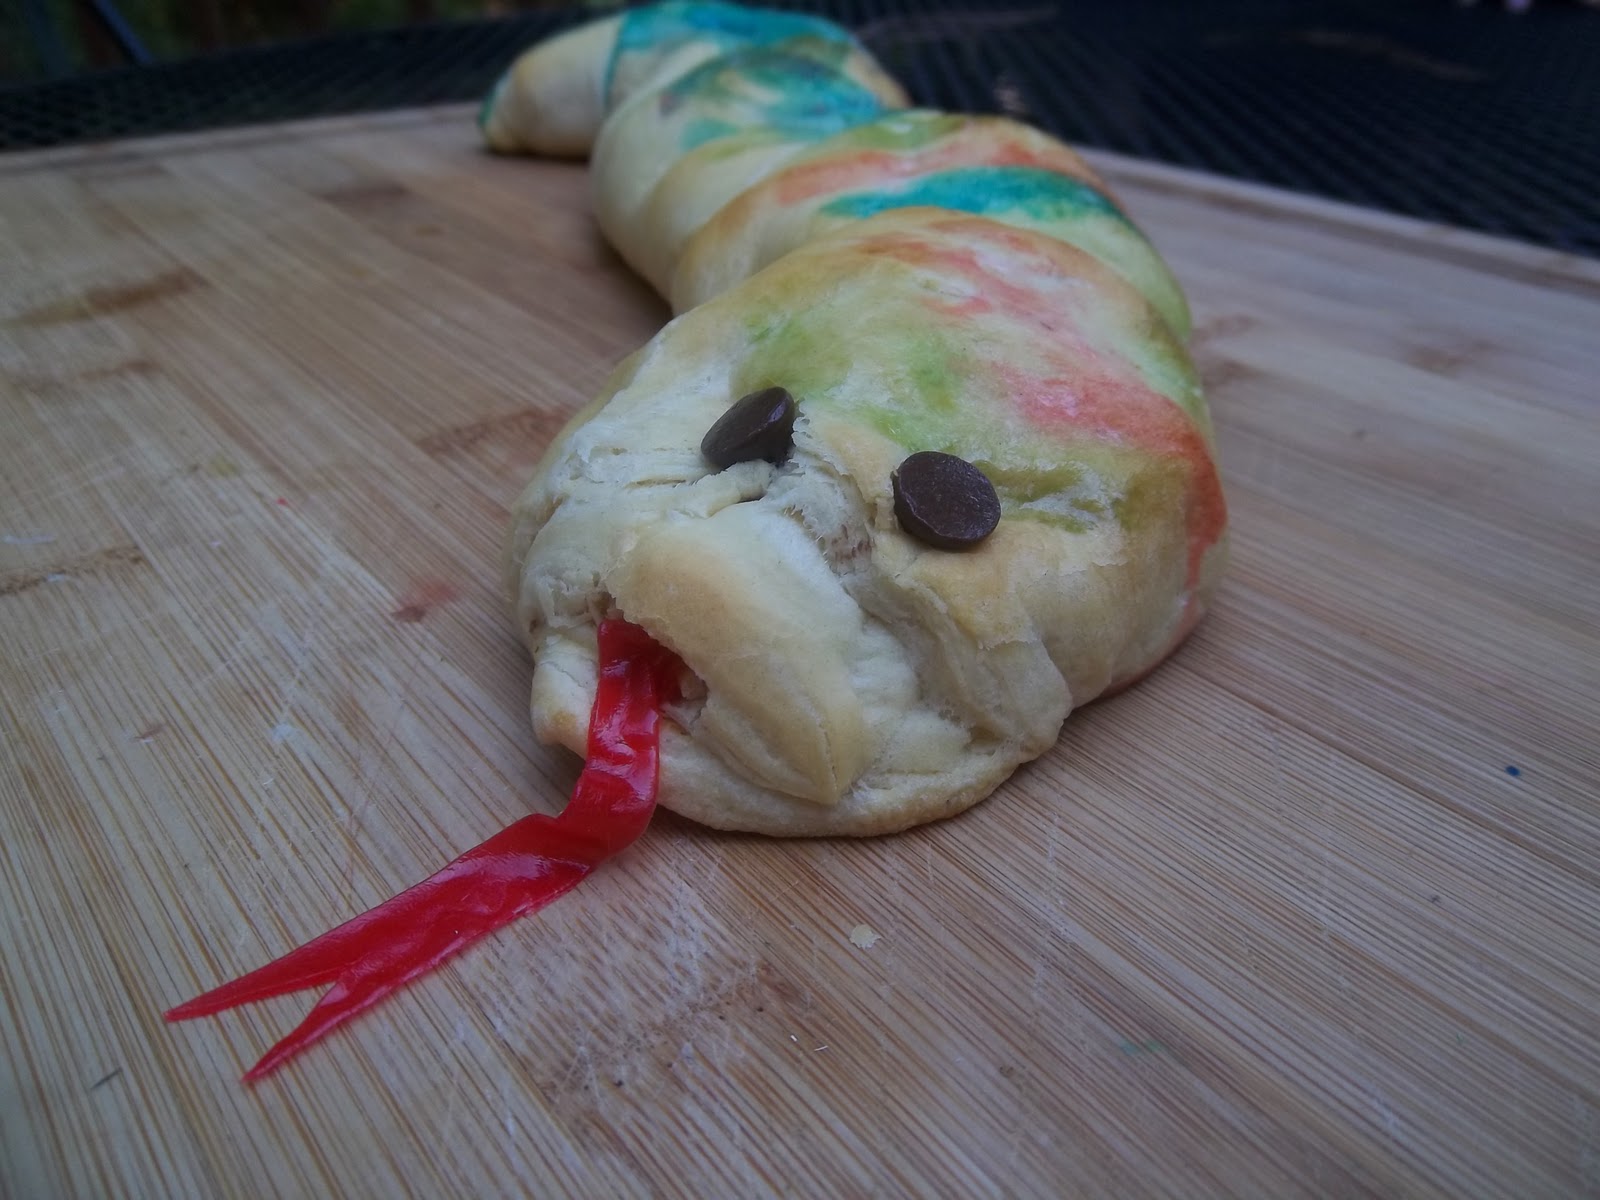
This snake is super easy to make.  You just start with one roll of Crescent dough.  I used Pillsbury.  Roll it out slightly, on a floured surface.  Transfer it to a cookie sheet.  Spread some Dijon honey mustard on it.


Now, layer your sandwich fillings down the middle.  I used some honey ham and smoked turkey.  I also sprinkled some Daiya Cheese on it. 


Now it is time to roll it up.  Fold the long sides over the middle.  Then give it a little roll up.


Next, shape the dough into a snake shape and squeeze one end into a tip for the tail.  Shape the other end into the head.  


Now it is time to decorate the snake.  Beat an egg with about a tablespoon of water.  Divide the egg wash into different bowls and add a few drops of food coloring.  My boys wanted to do green, blue and red.  Not  very authentic looking snake colors for the snakes we see here but whatev.


Let them at it with some little paint brushes and get some stripes on that snake!


Once you get your snake all decorated, pop it in a 350 degree preheated oven for 20-23 minutes.  

Let it cool slightly and then transfer it to a serving tray.  This is when you get to finish the snake off.  Add some eyes and a tongue.  It is cutest when you put some green olives with the pimentos on tooth picks and stick on the snake for the eyes.  But I hate olives and I am too cheap frugal to pay for olives just for decoration.  So I used some chocolate chips.  I just sort of pressed them into the snake head.  Then make a small slit for the tongue.  I used some fruit roll up that I just cut into a slit and then made a fork in the tongue.  I have also used a strip of red pepper before.  Your call.


My little Beanes loved making this and eating it.  We pretended to be scared.

Go ahead and make you a snake sandwich and then slice it up for dinner.  


Just a note:  Butter Beane does not normally have a mohawk.  He had just gotten his haircut that afternoon and we were coming straight home.  So he got a spike do. 

I am linking up this week at Metamorphasis Monday
and these other Awesome Parties!  Go check them out to see what other people have come up with.

Friday, August 19, 2011

Scooby-Doo Haunted House

Scooby Doo is big in our house.  Saturday we are having our second Scooby Doo birthday party.  String Beane had a Scooby party when he turned 3 and Butter Beane is having a Scooby party for his 3rd birthday Saturday.  

I have made another candy Haunted House this year.  It was a huge hit last time.  It is so simple to make and such a show stopper.  It is really worth the time to make it.  The theme can be totally customized to your event.

The house is made of a cardboard box duck taped to a piece of styro foam. Tape it on the styro foam open end up.  Trim the short side flaps at an angle.  Then you take a second card board box and cut it apart and use two sections to fold in to a peak for the roof.  Duck tape the roof on to the house.  Then cut a small hole in the roof and use a strip of the cardboard box to fold into a square tube for the chimney.  Duck tape it down.

Now that you have the frame it is time to decorate.  Since I was doing a Scooby theme I tried to make it look like a haunted house.  I used canned chocolate frosting and spread over the cardboard.  I lined the roof with graham crackers for the shingles.  I used red hots for the chimney bricks.  Hershey bars were the doors with Skittle door knobs.  Hershey bars were the windows with graham cracker shutters.  I used gum drops and pixie sticks to make a fence and oreos for the walk way.  I bought a Mystery Machine candy car and put it in the driveway.  Halloween suckers were the trees and Halloween peeps were the door decorations.  Then you just stick candy in the wet frosting all over.  As the frosting dries the candy is stuck to it.

For the party, I put everyone's name in a bag.  I drew out a name and that child got to pick a candy from the house.  I went through until all of the children had a turn and then it was a free for all.  They loved it!


I hope this year's Scooby party is just as much fun as last time.  Happy Birthday to my little Butter Beane.
I am linking up with these awsome parties.